

Cameras
The game is seen through an entity with a Camera component, looking along the entity’s forward axis (its -Z). A new scene has no camera. To add one, create an entity, press Add Component in the inspector and choose Camera.
- Projection:
Perspective, as the eye sees, orOrthographic, with no perspective, for 2D games, isometric views and maps. The inspector shows only the fields of the projection you choose. - Field Of View: how wide a perspective camera sees, top to bottom, in radians, from 0.1 to 3.04. It starts at 1.047 (60 degrees).
- Ortho Height: how tall an orthographic camera’s view is, in metres. It starts at 10.
- Near Z (0.1) and Far Z (1000): the nearest and furthest distances the camera draws, in metres. Keep the near distance as large as the game allows, because a very small one makes far surfaces flicker against each other.
- Clear Color: the colour the view is filled with before anything is drawn.
- Primary: whether this is the camera the game uses. It is on for a new camera.
The view’s shape comes from the window, or from the render texture a camera draws into, so Aspect is rarely used.
An orthographic camera still shows the sky: it draws the sky as a 60 degree perspective camera facing the same way would see it, so the sky turns with the view.
Which camera is used
Section titled “Which camera is used”The game draws through the first camera that is Primary, is not drawing into a texture, and whose entity is active. To cut to another camera, make the current camera’s entity inactive or turn its Primary off, and the next one takes over.
If a scene has no Camera component at all when it plays, the engine adds a camera named PlayerCamera, placed above and to the side of the scene’s origin and looking towards it, and logs a warning (in the editor, it appears in the Console). This happens both in the editor and in an exported game. It is enough for a first test, but give each scene its own camera.
Drawing into a texture
Section titled “Drawing into a texture”A camera can draw into a Render Texture instead of the screen, for a security monitor, a mirror or a minimap:
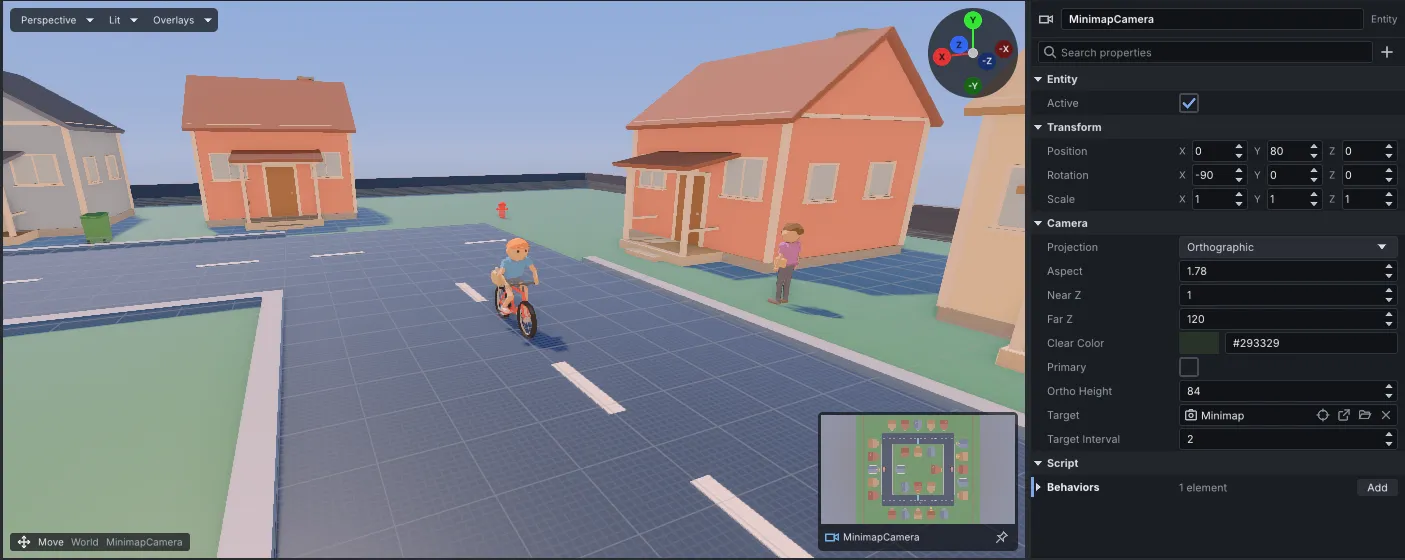
- In the Assets panel, choose New > Render Texture. Its Width and Height start at
256 pixels. Its Format is
Ldrfor an image shown as it would appear on screen or in UI, orHdrto keep the unprocessed linear values for a material that needs them. - Set the render texture as the camera’s Target.
- Use the render texture as a texture in a material.
A camera with a target never draws to the screen, whatever its Primary setting. Target Interval draws the texture only every so many frames (1 is every frame, up to 60), which saves time for an image that need not be smooth. Between updates the texture keeps the last image it drew.